
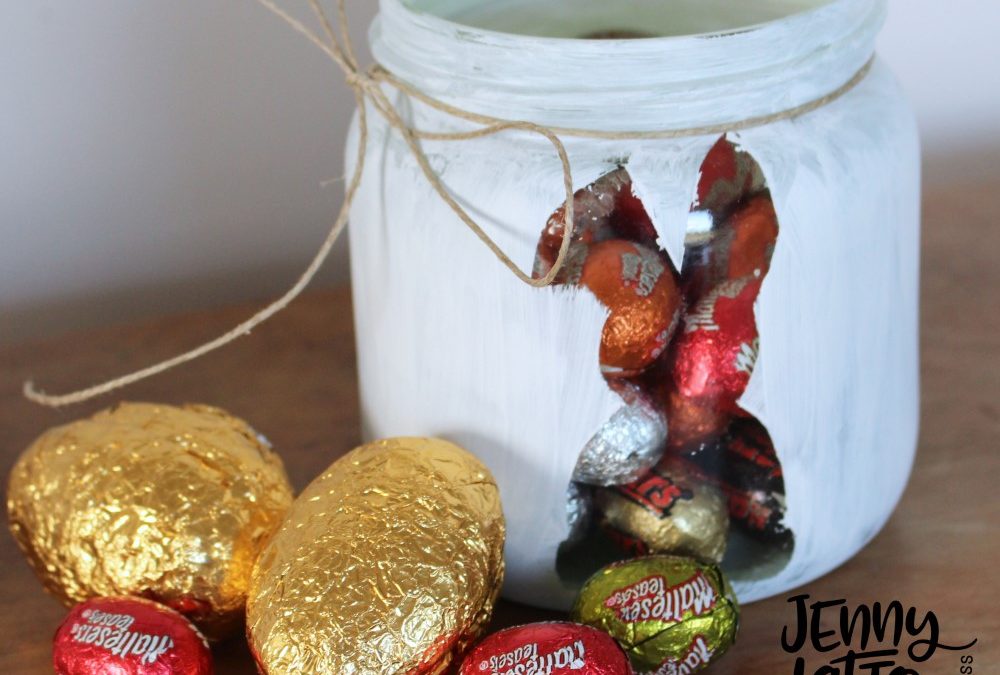
Decorate a Jar
This decorate a jar tutorial provides something a little special this Christmas or Easter to keep those sweet treats in. If you don’t want the kids overloaded on chocolate one option is having one treat jar for the whole family or if feeling a little adventurous one jar for each child, and decorate with your favourite theme. Of course you can put lights in for holiday decor or use it for as suggestion jar of activities to do on vacation, the ideas are limitless
For this tutorial, I picked a bunny rabbit but it would work just as well for a chicken, or any other shape. Normally I would cut my shape using vinyl and the Silhouette Cameo but since not everyone has this machine I have used double sided sticky tape 48mm wide. (UPDATE stencils have been added to the shop)
Instead of the tape you could use contact, the product that kids school exercise books are covered with. Which ever you use its to create a barrier to the paint, as once the jar has been painted and dried you will be removing the shape/stencil.
Supplies
- 1 Jar *
- Paint – acrylic (I used classic white from Voodoo Molly)
- Paint brush
- Double sided tape 48mm wide
- Shape/stencil
- Scissors
- Pen to trace shape
- Treats
*Choose your jar on how many treats you want to fit in the jar, the bigger the jar the more treats required. I used a small Agee jar

Instructions
1. Find a shape
Print the shape out or draw it and trace onto the paper side of the double-sided tape. Then cut out the shape from the tape and carefully place it on the jar, smoothing it out to remove all air bubbles. (leave the paper on)
2. Set up
Collect your paint, brush and jar, set them up on paper to protect the surface you are working on.
3. Painting
Dampen the brush with a little water then proceed to paint over your cut out shape and over the rest of the jar. Take care when painting over or near your shape to make sure that the paint doesn’t get under the tape, this can occur if the tape is not sticking to the jar or there are creases.

Allow paint to dry and then carefully remove your cut out, you will remove first the paper backing and then the tape. If a little paint has got in under the tape you should be able remove it with your fingernail.
4. Finish Up
Fill with the treats, add ribbon or string embellishments and your treat jar is ready. Ideal to also add a small string of lights for a Christmas feel.

UPDATE You can now purchase vinyl stencils in the shop. 4 designs available
Video
Decorate a Jar using the stencils found in the shop in conjunction with the video below

Trackbacks/Pingbacks